고정 헤더 영역
상세 컨텐츠
본문

반응형
수업시간에 블로그 웹사이트 만들기를 했다.
이번 프로젝트 난이도는 5점 만점 중에 3점.
감귤마켓 구현이 4점이라면,
어려운 수준은 아니라고 하셨다.
*
이번 포스팅 code들과는 상관없지만!
블로그 API라면, 아래 튜토리얼도 괜찮다고 말씀해주셨다.
(node, react까지 사용, 로그인 기능도 구현한다)
1. 초기세팅하기

// npm init --yes
// npm i nunjucks express cors helmet morgan
// npm i nodemon --save-dev
// -> nodemon app 으로 실행 가능
① app.js 파일 생성, 터미널 명령어
아래 사진(경로) 참고해서, 명령어를 입력한다.
cd 011_blog_api
요 폴더에서 각종 패키지들을 설치해준다.
② app.js 파일 생성
이 파일에 아래 code를 복붙해준다.
1. app.js (초기세팅)

// 파일이름 : 011_blog_API\app.js

// npm init --yes
// npm i nunjucks express cors helmet morgan
// npm i nodemon --save-dev
// -> nodemon app1 으로 실행 가능

const nunjucks = require('nunjucks');
const express = require('express');
const cors = require('cors');
const morgan = require('morgan'); // 디버깅
const helmet = require('helmet'); // 보안
const blogRouter = require('./router/blog.js');

const app = express();
app.set('view engine', 'html');

nunjucks.configure('template', {
    autoescape: true,
    express: app,
    watch: true
});

app.use(express.json());
app.use(helmet());
app.use(cors());
app.use(morgan('tiny'));

app.use('/blog', blogRouter);

app.get('/', (req, res) => {
    res.send('hello world')
    // res.render('test1.html', {
    //     name : "hojun!",
    //     age : 10
    // });
});

app.use((req, res, next) => {
    res.sendStatus(404);
})

app.use((err, req, res, next) => {
    console.log('애러났음!')
    console.log(err);
    res.sendStatus(500);
})

app.listen(8080);
③ 템플릿 코드
위의 code는 일종의 템플릿이기 때문에,
따로 해석하지 않는다.
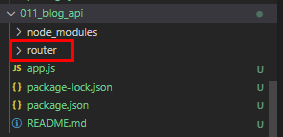
④ router 코드
router폴더 생성 -> blog.js 파일 생성
아래 code 복붙
이제 아래부터 분석을 해볼 예정!
2. router- blog.js 파일

// 파일이름 : 011_blog_API\router\blog.js

const nunjucks = require('nunjucks');
const express = require('express');

let blogs = [{
        id : 1,
        title : 'title1',
        content : 'content1',
        section : 'section1',
        pubDate : new Date().toString(),
        modDate : new Date().toString()
    }, {
        id : 2,
        title : 'title2',
        content : 'content2',
        section : 'section2',
        pubDate : new Date().toString(),
        modDate : new Date().toString()
    }, {
        id : 3,
        title : 'title3',
        content : 'content3',
        section : 'section3',
        pubDate : new Date().toString(),
        modDate : new Date().toString()
    }];

const router = express.Router();
1. router 폴더 생성 -> blog.js 파일 생성
DB연습하기
위에서 app.js 파일에 기본 세팅을 해두었으니,
여기서는 router 연습을 해본다.
실제 데이터베이스를 쓰기 전까지,
DB를 읽어오는 임시 변수를 생성
→ DB는 나중에 연결하고,
일단은 DB읽어온다는 가정 하에 연습!!
const express = require('express');

let blog = [{
        id : 1,
        title : 'title1',
        content : 'content1',
        section : 'section1',
        pubDate : 0,
        modDate : new Date().toString(),
        viewCount : new Date().toString()
    },{
        id : 2,
        title : 'title2',
        content : 'content2',
        section : 'section2',
        pubDate : 0,
        modDate : new Date().toString(),
        viewCount : new Date().toString()
    },{
        id : 3,
        title : 'title3',
        content : 'content3',
        section : 'section3',
        pubDate : 0,
        modDate : new Date().toString(),
        viewCount : new Date().toString()
    }]
1. 요구사항 명세서의 Data schema 넣기
블로그 게시글을 'blog' 변수에 담는다.
첫번째 블로그글, 두번째 글, 세번째 글을 샘플로 넣을 예정
// 연습한뒤, database로 넘어갈 예정
const router = express.Router();
// 라우터 폴더와 연결

// 2.기본구조
router.get()
router.post()
router.put()
router.delete()
2. 기본 구조
// 2-1. 기본구조
router.get('/', (req, res, next) => {
})
router.post('/', (req, res, next) => {
})
router.put('/', (req, res, next) => {
})
router.delete('/', (req, res, next) => {
})
2-1. 기본구조
// get 부분 기본 구조
// 1. / url에 최신게시물 3개 응답
// 2. / blog에 list 모두 응답
// 3. /blog?section=it - it관련된 글 모두 응답
html과 DB연결하기
- 마이크로 서비스 형태
① html 파일에서 fetch 사용해서 url 던져주기
② 위 code가 url별로 받아서 뿌려줌
③ 이걸 다시 html 파일에서 받아와서 뿌려줌.
router.get('/')은 무엇을 가리키는가?
- app.js 파일의 blogRouter변수
// const blogRouter = require('./router/blog.js');
→ url에 슬래시(/)가 있으므로,
blogRouter로 app.js 파일, router 파일(blog.js) 을 연결
*
blog.js에 있는
router.get('/')은 슬래시가 기준점!!
ex) 8080/blog
router.get('/', (req, res, next) => {
    console.log(req.query);
    const section = req.query.section;
    const data = section ?
    blogs.filter(blog => blog.section === section) :
    blogs;
    res.status(200).json(data);
})
router.post('/', (req, res, next) => {
})
router.put('/', (req, res, next) => {
})
router.delete('/', (req, res, next) => {
})
const data = section ? 있는경우 : 없는경우;
blogs들(=게시글) 이 들어오게 되면
각각의 object로 취급된다. (게시글 1,2,3)
1. 게시글과 section이 같을 경우
각각의 게시글과 blog의 section이 같다면
(쿼리스트링으로 가져온 섹션이 같다면)
그걸 다 뽑아준다.
→ 뽑아준 것들을 data에 넣어주겠다.
2. 없을 경우
blogs로 주기
(전체를 다 return)
※ 만약 /blog?section=it 에 ?해서
섹션값이 들어가 있지 않는다면 undefined가 뜬다.
그래서 있는 경우 없는 경우로 나눠서
데이터를 뽑아낸 다음에 status 창 출력
로직
ⓐ 데이터를 있는 경우, 없는 경우로 나눠서 뽑아낸다
ⓑ 매치가 된다면, status 200을 주고
json으로 data를 넘겨준다. (마이크로서비스")
ⓒ html 파일에서 fetch 사용하고 던지기
→ url로 받아서 뿌려주기
3. router- blog.js 파일(테스트) : DB 분리전 (완성)

blog.js 파일 (테스트용)
- practivce파일 실행인데, 실행시 blog.js 파일로 이름변경

const express = require('express');

let blog = [{
        id : 1,
        title : 'title1',
        content : 'content1',
        section : 'section1',
        pubDate : 0,
        modDate : new Date().toString(),
        viewCount : new Date().toString()
    },{
        id : 2,
        title : 'title2',
        content : 'content2',
        section : 'section2',
        pubDate : 0,
        modDate : new Date().toString(),
        viewCount : new Date().toString()
    },{
        id : 3,
        title : 'title3',
        content : 'content3',
        section : 'section3',
        pubDate : 0,
        modDate : new Date().toString(),
        viewCount : new Date().toString()
    }]

    // 이런식으로 연습한 뒤, database로 넘어가는 걸 추천

const router = express.Router();


// 3. get 부분
// 1. / url에 최신게시물 3개 응답
// 2. / blog에 list 모두 응답
// 3. /blog?section=it - it관련된 글 모두 응답

router.get('/', (req, res, next) => {
    console.log(req.query);
    const section = req.query.section;
    const data = section ?
    blog.filter(blog => blog.section === section) :
    blog;
    res.status(200).json(data);
})

module.exports = router;

// router.post('/', (req, res, next) => {
// })
// router.put('/', (req, res, next) => {
// })
// router.delete('/', (req, res, next) => {
// })

// router.post()
// router.put()
// router.delete()
요걸 실행해서 브라우저에 잘 뜨는지 확인 예정
// npm init --yes
// npm i nunjucks express cors helmet morgan
// npm i nodemon --save-dev
// nodemon app
3. cd 011_blog_api
blog api 폴더에서 위 명령어 실행
(내 컴퓨터에서 주의사항)
practice.js 파일과 blog.js파일이 있는데,
연습용 파일을 실행시킬때는
파일명을 blog.js로 변경시켜준다.
blog.js 파일이 전체 코드고,
practice.js가 테스트 코드로 설정해놨기 때문
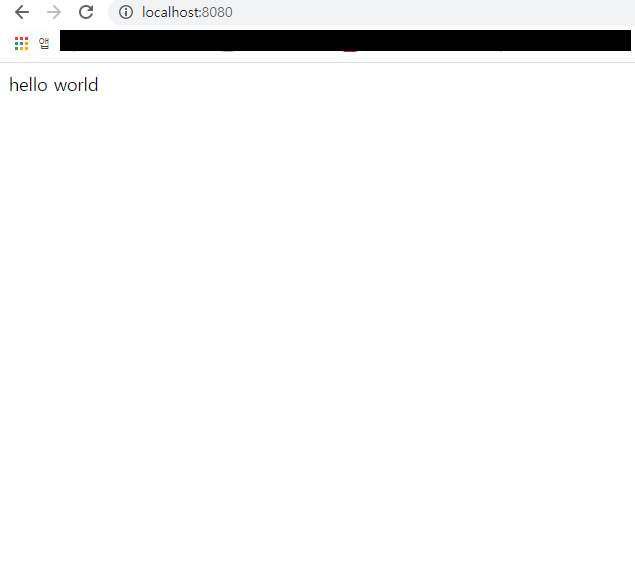
4. http://localhost:8080/ 페이지
터미널에서 node app 실행
- 브라우저에서 localhost:8080 들어가보기
반응형

4-1. http://localhost:8080/blog 페이지
전체 게시물 모두가 찍힌다.

4-2. http://localhost:8080/blog?section1
섹션 1 부분만 보인다.
블로그 웹사이트 만들기
기본 경로 설정
보통 블로그 서비스를 만든다고 하면,
폴더트리는 다음과 같이 된다.
router 폴더에
blog.js / oauth.js /notice.js
blog.js : blog 관련된 것
oauth.js : 인증, 로그인 관련된 것
notice.js : 게시물이 가지고 있어야 할 댓글 등의
data를 보존하는 파일
5. DB분리하기
위에서 성공적으로 실행은 됐으나,
blog.js 파일에 blog기능과 DB기능이 붙어있다.
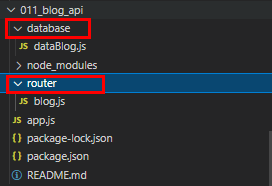
DB는 폴더를 따로 분리해준다.
분리시 장점:
- blogs.js 코드가 간결해진다
- DB연결하는 기능을 그 파일에서 진행 가능하다
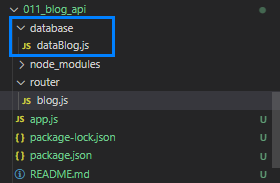
5. database 폴더 생성, dataBlog.js 파일 생성
- DB만 뽑아서 여기 넣기 (아래 code) 참조
4. router- dataBlog 파일(테스트) : DB 분리파일

// dataBlog.js 파일
// DB 연결할 때 수정해야 하는 코드
let blogs = [{
    id : 1,
    title : 'title1',
    content : 'content1',
    section : 'it',
    viewCount : 0,
    pubDate : new Date().toString(),
    modDate : new Date().toString()
},{
    id : 2,
    title : 'title2',
    content : 'content2',
    section : 'it',
    viewCount : 0,
    pubDate : new Date().toString(),
    modDate : new Date().toString()
},{
    id : 3,
    title : 'title3',
    content : 'content3',
    section : 'section3',
    viewCount : 0,
    pubDate : new Date().toString(),
    modDate : new Date().toString()
}]

module.exports = blogs;
//(Router- blog.js파일)
3. router- blog.js 파일 : DB 분리후

// blogs.js 파일(수정버전)

const express = require('express');
// 1. DB 옮겼음
const blogs = require('../database/dataBlog')
// 2. DataBlog 파일 연동

const router = express.Router();


// 3. get 부분
// 1. / url에 최신게시물 3개 응답
// 2. / blog에 list 모두 응답
// 3. /blog?section=it - it관련된 글 모두 응답

router.get('/', (req, res, next) => {
    console.log(req.query);

    // 3. blogs 안에 있는 blogs로 filter/return값 변경하기

    const section = req.query.section;
    const data = section ?
    blogs.filter(blog => blog.section === section) :
    blogs;
    res.status(200).json(data);
})

module.exports = router;

// router.post('/', (req, res, next) => {
// })
// router.put('/', (req, res, next) => {
// })
// router.delete('/', (req, res, next) => {
// })

// router.post()
// router.put()
// router.delete()
오늘 한 것: 2가지 연습!!
DB를 분리하지 않고, 통으로 테스트하는 것!
DB 분리후, 테스트 하는 것
DB분리 전 ver : app.js / rotuer- blog.js
DB분리 후 ver: app.js / router -blog.js
get 부분까지 작성해보았다.
반응형
'IT 공부 > 프로젝트(project, 부트캠프 및 협업)' 카테고리의 다른 글
| 글자 수 계산기 프로그램 직접 만들기 (0) | 2022.01.26 |
|---|---|
| 로또 번호 생성 알고리즘 javascript로 작성하기 (0) | 2022.01.24 |
| 셀렉트박스 커스텀(select box custom) ul, li로 만들기 (0) | 2021.11.30 |
| 자판기 만들기 (vending machine project): 마크업 작업(html)_1 (0) | 2021.11.22 |
| 1-2. 홈페이지 제작: css 입히기 (값 초기화, css.reset) (0) | 2021.10.05 |


댓글 영역